DASHBOARD
Adding a Bookable Space
Dashboard
Adding a Bookable Space
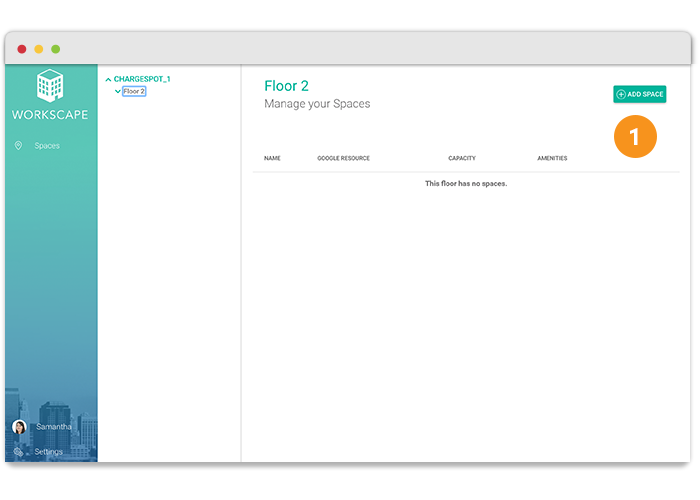
1.In the Spaces section of the Workscape Dashboard, select the floor you would like to create your new space on from the dropdown menu.
*Note: You must have a floor created before creating a room. To create a floor see Adding Floors
2. Click “Add Space” to begin creating a new bookable space.
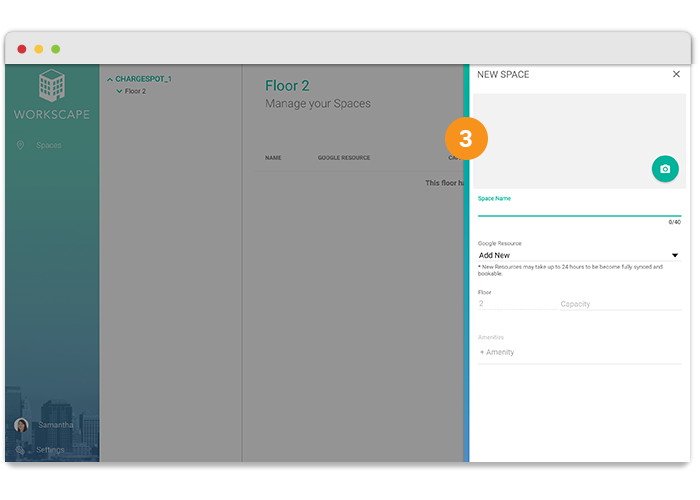
3. In the room editor pop-up, fill in the room’s information and upload a photo of the room. Your amenity list can be edited under Settings. This photo will be used on the mobile app and the rooms display. The photo should be a minimum of 2048px by 1536px and should not exceed 500kb.
If you do not have a photo of the room yet, you can use the default image.
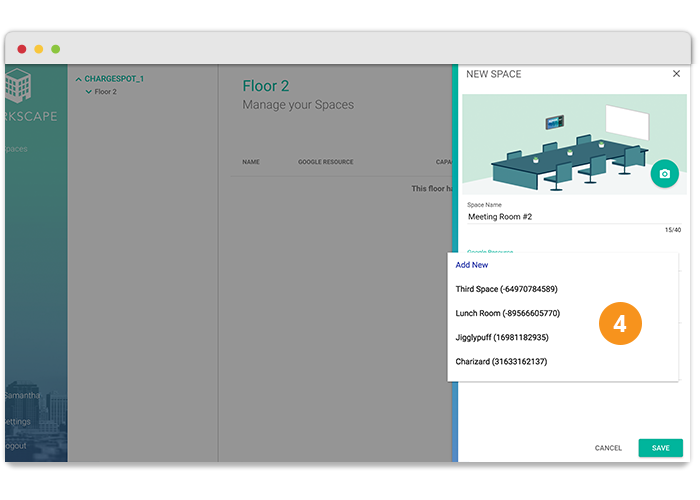
4. Link the room to a Google Resource. The dropdown list will only show resources that have not been linked to a room yet.
If a Google Resource has not been made for this room, select “Add New”. A new resource will be created with the room name you have entered.
For adding Google Resources using admin.google.com, see Creating Google Resources
5. Save your new bookable space.
*Note: It may take up to 24 hours for the room to become fully synced and bookable.
View the status of your rooms on the room list.
![]() means the room is pending.
means the room is pending.
![]() indicates a bookable space.
indicates a bookable space.
Edit any existing room by navigating to the floor it’s on and clicking the room in the list.


